Timeline
(September 2014) - Moving In and Rewire Round One
(October 2014) - New Roof
(March 2015) - New Fence
(June 2015) - New Carriage Doors
(July 2015) - Bamboo, Bamboo, and More Bamboo
(October 2015) - Making Bridges and Trestles
(November 2015) - Side Porch Exterior Restore and Final Rewire Through Wall
(January 2016) - Upper and Lower Loops Installed First Time
(March 2016) - Side Porch Interior
(June 2016) - Upper and Lower Loops Removed
(July 2016) - Goodbye Trees
(August 2016) - Fence Behind Garage and Skid Shed
(September 2016) - New Acquisitions and Upper Loop Reworked and Installed
(October 2016) - Upchurch Invasion
(Early November 2016) - Garage Back Wall and Paint Carriage Doors, New Wall, and Trim
(Late November 2016) - Remove Old Oil Furnace and Make New Hatch
(December 2016 - August 2017) - Bathroom Demolition Begins and Finally Complete
New Acquisitions
Shortly after getting the backyard sodded and squared away, Ann and Nick found some garden scale trains at our local flea market, and "dragged" me there to look at them... I'm joking. I had not seen anything model train related there for years and had stopped going. I kept asking myself how many times can you look at pretty much the same "junk" and not think that your time would be better spent elsewhere? My time had been dedicated to the bathroom remodel and backyard remake, at least on the weekends when the flea market was open, so I'm excited to go check out the trains and curious as to what they've found.
Turns out they're Bachmann "Big Haulers" like the other B&O set we already have. It's actually three different sets, but they wanted too much for each of them separately, so I asked how much for the lot? That seemed to stir some activity and messaging with the seller. We take the whole kit and kaboodle for ~$400, including throwing in a truss bridge I really wasn't interested in for free. We carefully squirreled away everything in the trunk of the car and headed home with our score.
All three engines are "ten wheelers", 4-6-0s, and one of them is exactly like Ann's engine I got her for Christmas. The other two are identical Atchison, Topeka, and Santa Fe (AT&SF), at least, they used to be. One was missing the the colored inserts on most of the pilot truck wheels and the other its bell. Not having a layout, or even a loop of track to test them out with, I did the next best thing and grabbed a three foot section of track, a power pack, and a couple jumpers. Let see what they can do! All three run! Well, if I lost my motivation, I certainly have it back now...
Track Planning
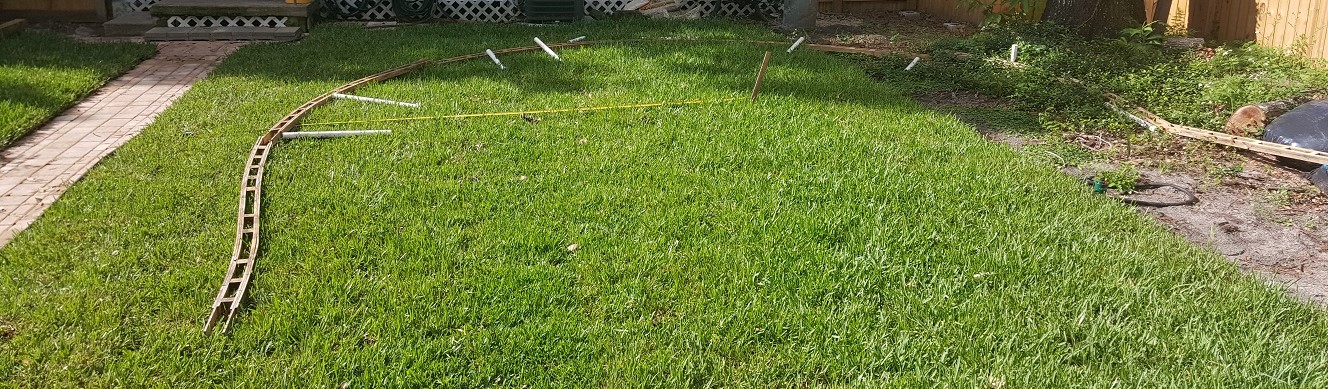
The yard has undergone some major changes, both before and after getting the railroad in place the first time around. All the splined roadbed stringers I had to remove when we had the trees removed were just sitting by the garage, along with all the trestle bents, still flimsily connected together. They just sat out in the elements, moved from place to place as they once again got in the way of something else going on. Until the dogs destroyed them that is. Eventually I moved them over along the fence along with the concrete blocks I had used to stage the bridge, in anticipation of their installation once again. Shortly after the sod went in, I begin to reinstall the upper loop of track, now in its third incarnation.
At first we planned a "folded dogbone" layout, with an upper and lower loop, but this time the plan is different. Instead of being able to run the loops parallel to themselves and the garage, we'll need to curve away from the garage towards the fence. Ann is worried there won't be enough room to run the track that close to the walkway and the patio. I rethink the plan and decide to have the bridge span what may eventually become the water feature, but will now be where the lower loop crosses under the upper loop. The upper loop comes back to meet itself, running parallel and downhill along the fence. It will curve around the back corner, still continuing downhill along the back fence toward the shed. It will curve around behind the shed and come out between the garage and the shed back toward the other fence, then curve around to become the lower loop.
Delays And More Delays
We started around Christmas of 2016 to renovate our bathroom, but it was six months later before we got back to laying track. While the stringers still weren't in bad shape, they would need "reworked" in order to be useful again. The loops will still be about the same place as last time, but now they'll turn back on themselves, then return, rather than just being half circles. Kind of like a teardrop shape. At least the upper loop will be teardrop shaped. I managed to get the upper loop and return legs installed. Even the bridge and approach trestles were ready to go in.
Our niece and her family stopped by to visit while they were down here at Disney just before Halloween 2016. Her son, Myles, had fun playing with the flea market find engine and some cars. I even connected up a power pack so he could run them back and forth, but he soon grew bored with the whole idea of not having at least a loop of track to run it all the way around. I was just as disappointed as he that westill couldn't run trains. I decided I'd had enough. It's time to get at least a simple loop finished.
The discovery that the boxes of track stored along the back wall of the garage were soaking wet meant rain was getting in. On closer inspection, the bottom five courses of siding needed replaced. It's disappointing that now there's something else that needs done before we can get back to laying track, especially when we just finished the big thing that needed done, the bathroom.
Making Bridges
I made another jig for cutting and assembling a howe deck truss bridge using the same using the same approach as the through truss, but this time I mark the channels too, not just the guidelines. No mistakes this time. I get it routed correctly and drill holes where the threaded rods will go. I still have to hand drill the bridge members for them, but at least everything lines up correctly. I knock out the first truss in a few days. I need to cut some more threaded rod for the second, so it takes a bit longer. Within a few weeks I'm able to put together a howe deck truss bridge, suitable for display purposes anyway. It still needs stained and I'm not sure it's actually correct to prototype since all the pictures of a howe deck truss bridge that I've seen show the ends as diagonals with a straight pile to the caps, not connected to the rest of the bridge via the top beams, just there to support the stringers above. Looks good though...
So now that I have a scale 48' (actual 24") long deck bridge, I can see that if I make it much longer, it will definitely look out of proportion. Time for a much longer (and much taller) howe through truss bridge. If I'm going to span that water feature with it that is. I start hand drilling the beam pieces, again with the staggered modular approach in mind. The deck truss was fairly rigid and did pretty well using the modular approach. The through truss is much larger, but still uses the same sized members, so it is far less rigid and much more prone to moving where it shouldn't. I manage to get a short truss together, enough for proof of concept and testing out the new jig.
As I assemble the longer 4' version of it, the problem becomes keeping it together without the beams wanting to come apart, especially where the staggered joints overlap. Tightening the nuts helps some, but I end up having to use larger washers over the outside joints in the beam to keep them from pushing apart as I tighten them. It works enough to get the first truss together, but I decide I need to just use one long piece in between the more prototypical sections that will be seen on the outside. This not only helps rigidity tremendously, but also eases assembly greatly, providing the "backbone" the structure needs.